In SAP MM, procurement process involves the cost of goods and services that needs to be paid to the vendor by an organization. The cost being paid must be posted in an organization necessarily in a correct general ledger (G/L) account. It is quite impossible to recollect and feed the correct G/L account every time during procurement. To avoid this inconvenience, the SAP system can be configured so that the system will automatically determine the correct G/L account that needs to be posted. G/L account is posted when goods receipt is done as well as during clearing the invoice verification. Account determination deals with the following terms−
- Define Valuation Control
- Group together Valuation Areas
- Define Valuation Classes
- Configure Automatic Posting
Define Valuation Control
Valuation areas can be grouped together and can be assigned to one grouping code, if they belong to the same G/L account. For example, different plants under one company code can be assigned the same valuation grouping code and vice versa. Before this, valuation grouping code must be activated and this can be done by following the steps given below.
Path to Activate Valuation Grouping Code
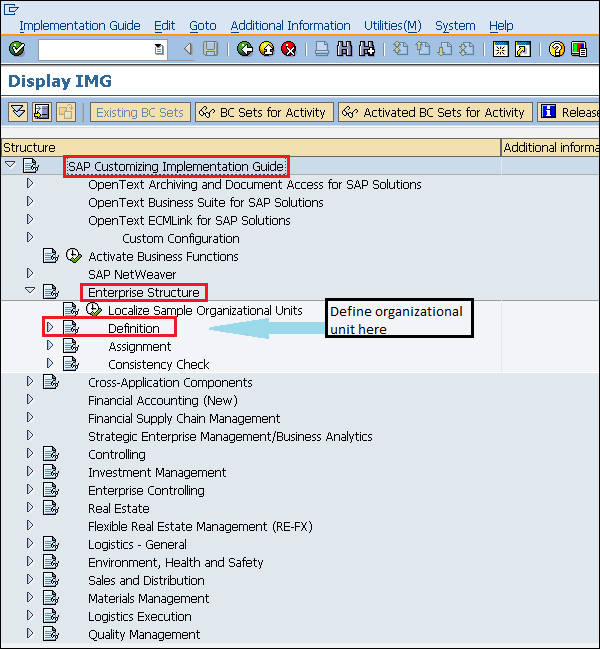
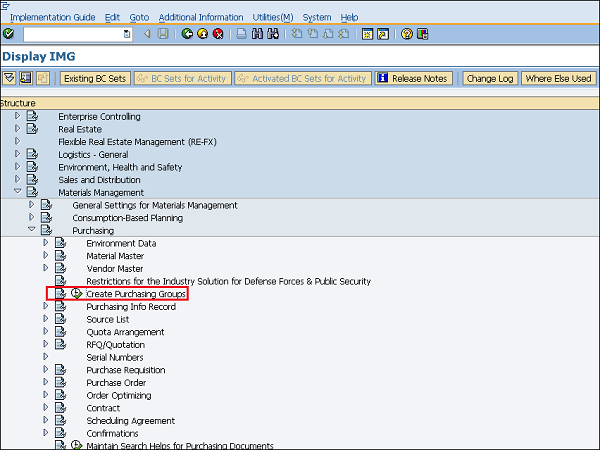
IMG ⇒ Materials Management ⇒ Valuation and Account Assignment ⇒ Account Determination ⇒ Account Determination without Wizard ⇒ Define Valuation Control
TCode: OMWM
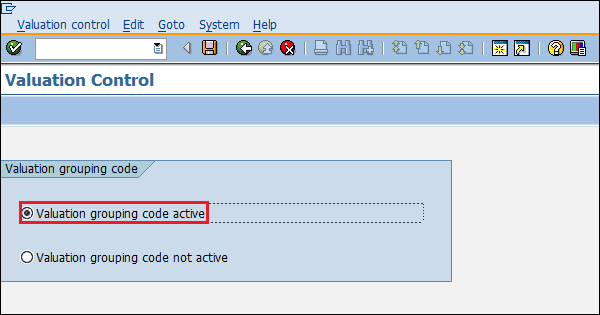
Step 1 − On the Display IMG screen, select Define Valuation Control by following the above path.
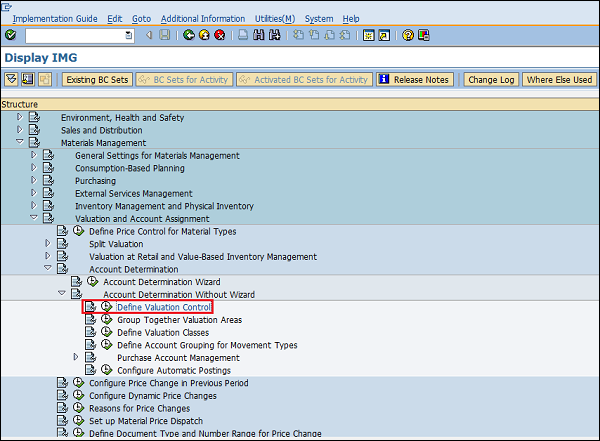
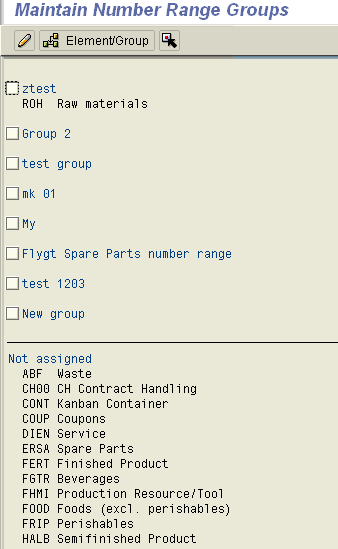
Step 2 − Select Valuation grouping code. Click on Save. Valuation grouping code is now activated.
Group Together Valuation Areas
In valuation grouping, valuation area and valuation grouping code are assigned to the company code. This can be done by following the below steps.
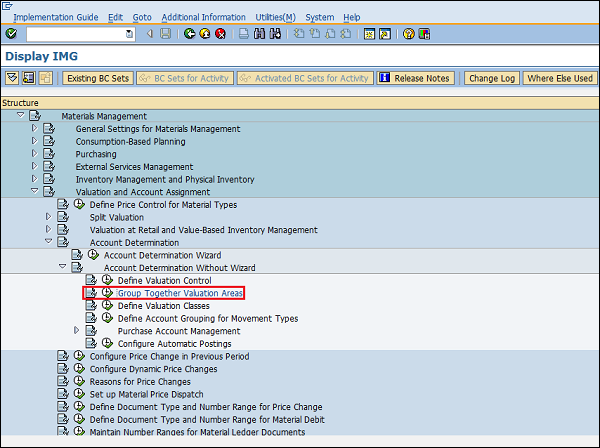
Path to Define Valuation Area and Valuation Grouping Code
IMG ⇒ Materials Management ⇒ Valuation and Account Assignment ⇒ Account Determination ⇒ Account Determination without Wizard ⇒ Group Together Valuation Areas
TCode: OMWD
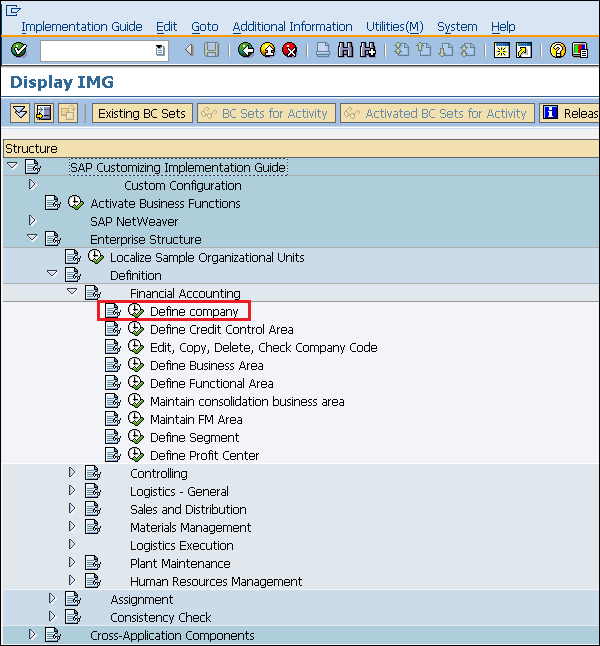
Step 1 − On the Display IMG screen, select Group Together Valuation Areas by following the above path.
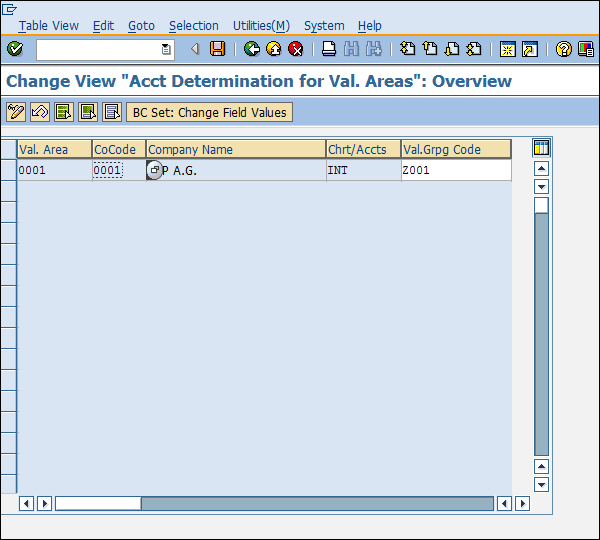
Step 2 − Here you can define a valuation area with grouping code, and assign them to a company code. Click on Save. Valuation area and valuation grouping code are now defined for a company code.
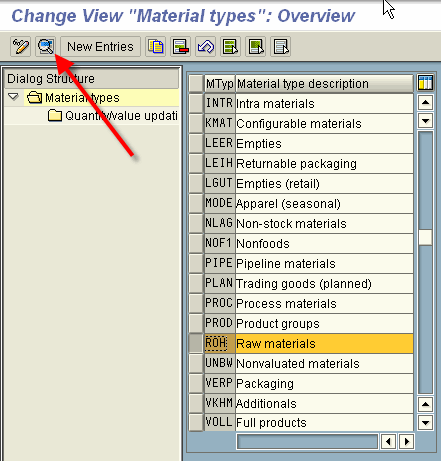
Define Valuation Classes
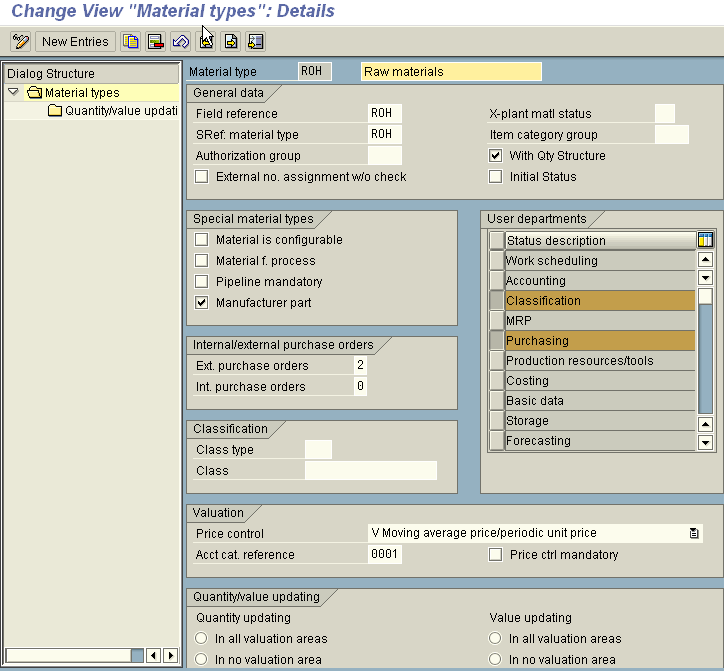
Valuation class categorizes the G/L account on the basis of material type. For example, raw material will have different G/L account than the finished material, as the costs will be different in both the cases. Account reference is also maintained along with the valuation class. Account reference and valuation class can be defined by following the steps given below.
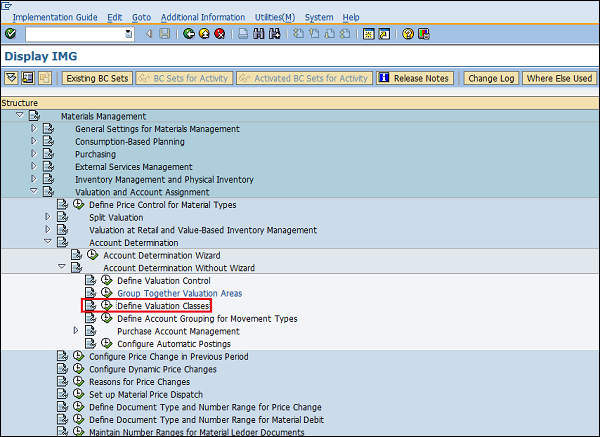
Path to Define Account Reference and Valuation Class
IMG ⇒ Materials Management ⇒ Valuation and Account Assignment ⇒ Account Determination ⇒ Account Determination without Wizard ⇒ Define Valuation Classes
TCode: OMSK
Step 1 − On the Display IMG screen, select Define Valuation Classes by following the above path.
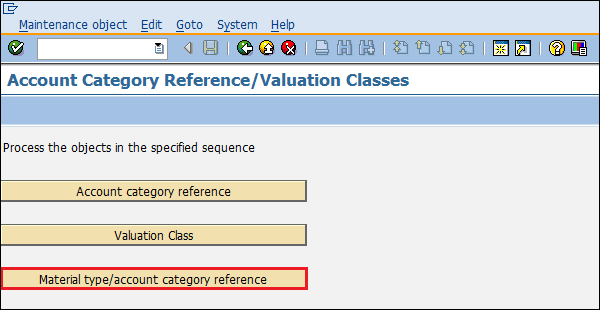
Step 2 − Click the Account Category Reference button.
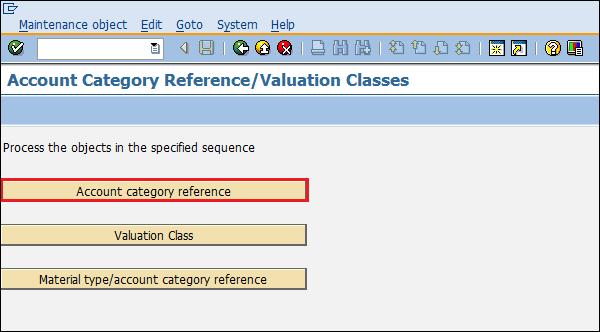
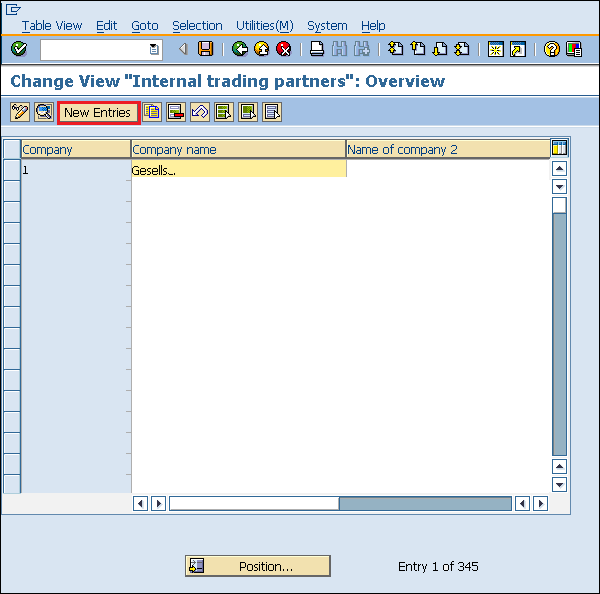
Step 3 − Click New Entries.
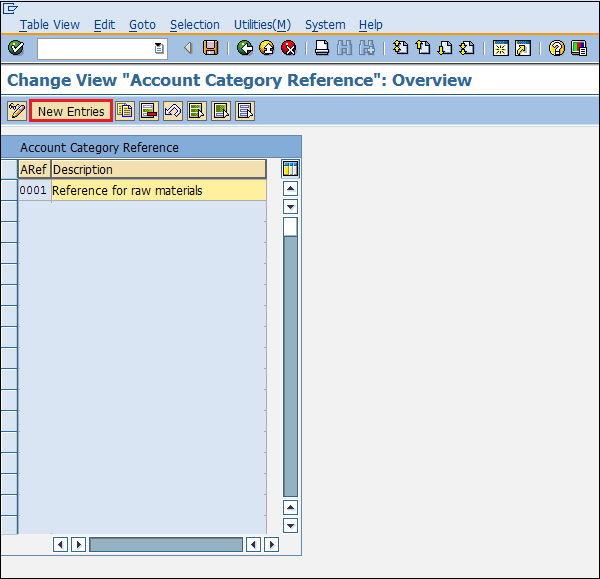
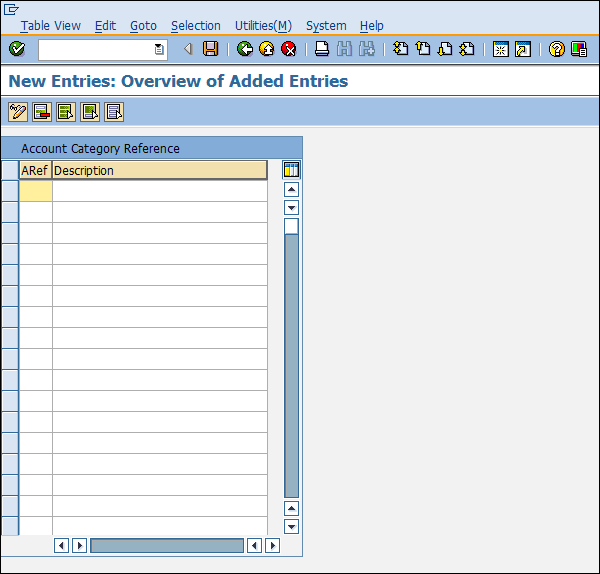
Step 4 − Provide the name of ARef (Account reference) along with its description.
Step 5 − Now go to same screen and click Valuation Class.
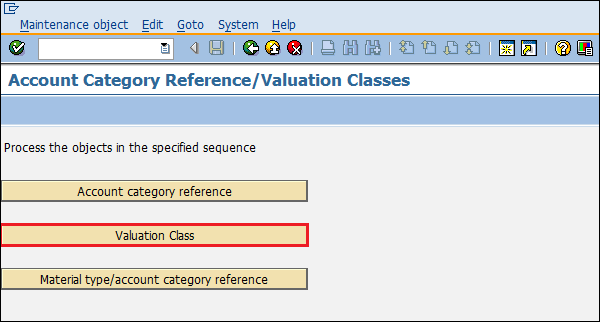
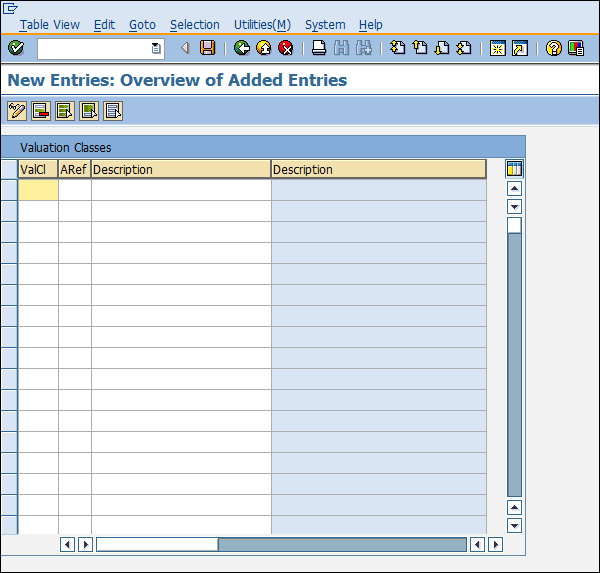
Step 6 − Click New Entries.
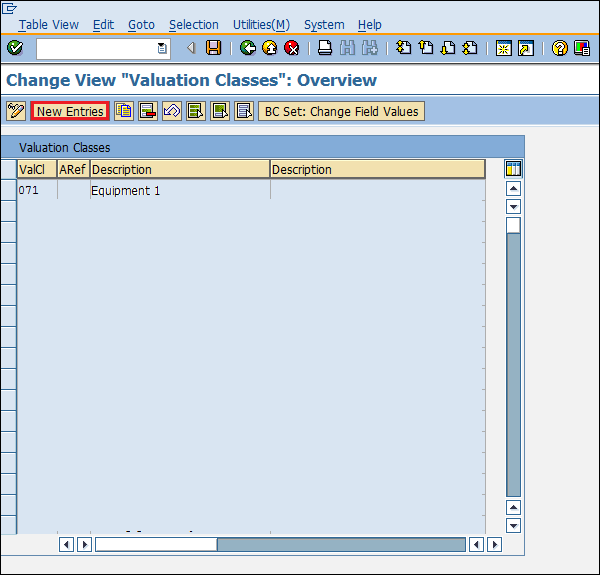
Step 7 − Provide the name of valuation class, ARef (Account reference), and description of valuation class.
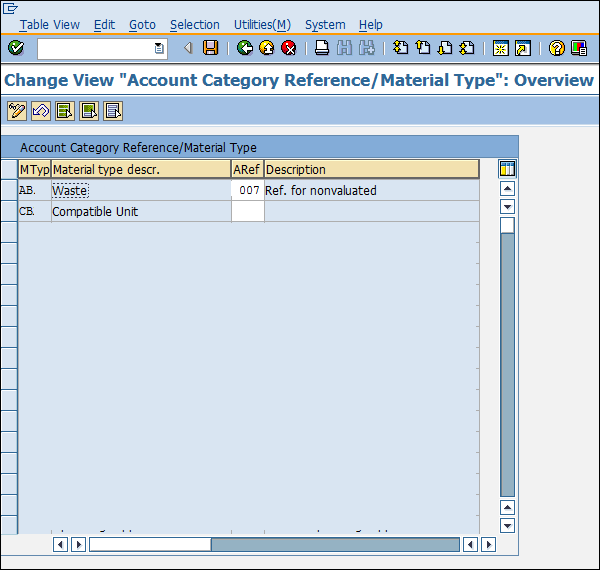
Step 8 − Now go to the same screen and click Material Type/Account Category Reference.
Step 9 − Here you can map material type with ARef (Account reference). Click on Save. G/L account can now be posted for different material types.
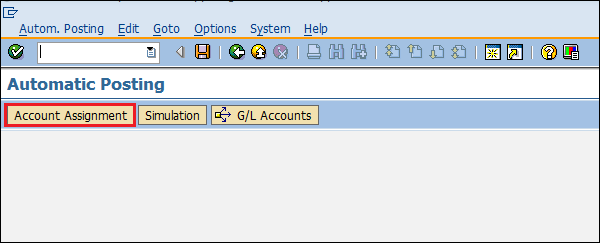
Configure Automatic Posting
G/L account is automatically determined for each of the transactions. It happens so because automatic postings are configured in the SAP system. Automatic posting can be configured by following the steps given below.
Path to Configure Automatic Posting
IMG ⇒ Materials Management ⇒ Valuation and Account Assignment ⇒ Account Determination ⇒ Account Determination without Wizard ⇒ Configure Automatic Postings
TCode: OMWB
Step 1 − On the Display IMG screen, select Configure Automatic Postings by following the above path.

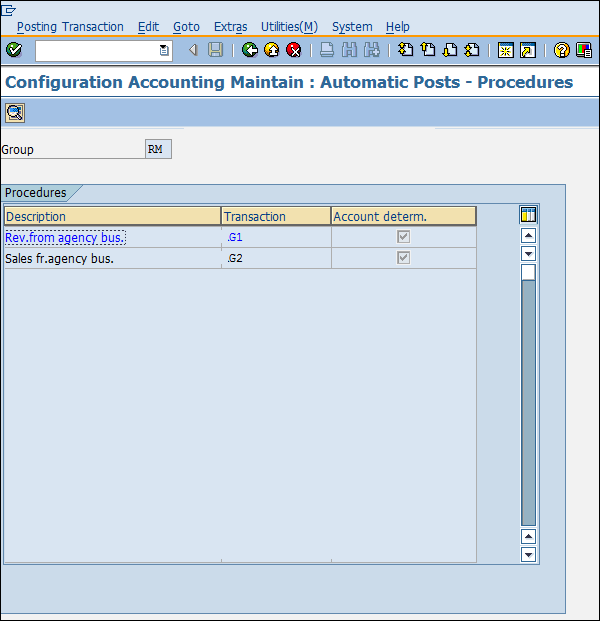
Step 2 − Click Account Assignment.
Step 3 − Here you can maintain the transaction for which automatic account determination is there. Click on Save. Automatic posting for transactions is now configured.

 '
'